
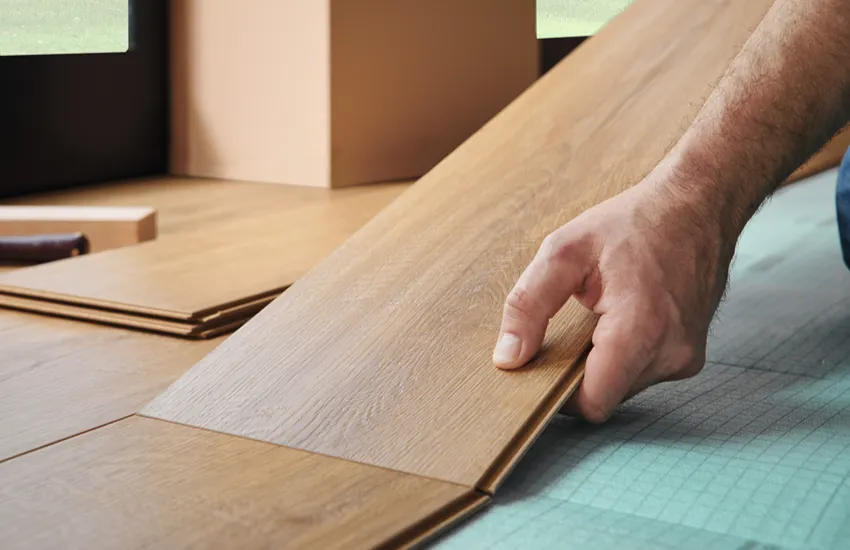
Laminate flooring offers a practical way to update your home’s interior with the appearance of wood and a consistent finish. Its click-lock planks are designed for floating installation, which means they connect to one another rather than being fixed directly to the subfloor. With careful planning, the right tools, and proper preparation, many homeowners handle a straightforward room installation themselves.
This guide explains how to prepare your floor, lay laminate planks, make accurate cuts, and finish the edges for a neat result.
What You Need to Install Laminate Flooring
Prepare your materials and tools before starting the project. Having everything within reach helps you work efficiently and reduces interruptions.
Materials:
- Laminate flooring planks, including extra boards for cuts and waste
- Compatible underlayment, where required
- Moisture barrier for suitable concrete installations
- Expansion spacers
- Skirting boards or finishing trim
- Transition profiles, where needed
Tools:
- Tape measure and pencil
- Spirit level or straightedge
- Rubber mallet and tapping block
- Pull bar
- Jigsaw or suitable flooring saw
- Utility knife
- Safety glasses and knee pads
Check the manufacturer’s installation guide before purchasing underlayment or moisture protection. Some laminate products include an attached backing, while others require a separate layer.
Step 1: Measure the Room and Plan the Layout
Measure the room’s length and width, then multiply the measurements to calculate its floor area.
For a rectangular room:
Floor area = Length × Width
For example, a room measuring 5 metres by 4 metres has an area of 20 square metres. Add around 10% for cutting waste as an initial estimate. Complex layouts, alcoves, and diagonal patterns often require additional material.
Next, decide which direction the planks should run. Laying them along the longest wall or towards the main source of natural light often creates a balanced appearance.
Check the width of the first and final rows before installation. Adjust the starting row if the final strip would be too narrow to fit securely.
Step 2: Prepare the Subfloor
Subfloor preparation plays a major role in the finished floor’s stability. Remove unsuitable existing flooring, dust, loose debris, and adhesive residue. Check the surface for cracks, raised areas, and low spots.
Use a straightedge to identify uneven sections. Repair or level the subfloor within the tolerances specified by the laminate manufacturer. Concrete must also meet the required moisture limits before installation.
Never install laminate over carpet or a soft, unstable surface. Existing hard flooring is suitable only when the product instructions permit it and the surface meets the required conditions.
Allow repaired areas to dry fully before proceeding.
Step 3: Acclimate the Laminate Planks
Some laminate products require acclimation in the installation room before laying. Follow the manufacturer’s instructions for the required time, temperature, humidity, and packaging conditions. A period of 48 hours is common for traditional laminate products, but the exact requirement varies.
Keep the flooring in the specified storage position and protect it from moisture. Acclimation helps the material adjust to indoor conditions and reduces the risk of unwanted movement after installation.
Step 4: Install the Underlayment and Moisture Barrier
Lay the approved underlayment over the prepared subfloor if your flooring system requires it. Follow the product instructions for seam placement and taping.
Concrete installations often require a moisture barrier to protect moisture-sensitive laminate cores. The correct barrier and installation method depend on the subfloor and flooring specification.
Avoid adding a second underlayment beneath planks with an attached backing unless the manufacturer approves it. An incompatible layer might affect the locking joints or the floor’s stability.
Step 5: Lay the First Row of Laminate Flooring
Start along a straight wall and position spacers to maintain the required expansion gap around the room’s perimeter. The manufacturer’s instructions determine the correct gap size.
Connect the first row of planks according to the specified click-lock method. Check alignment as you work. A straight first row provides a reliable starting point for every row which follows.
Measure the final plank in the row and cut it to fit. Use the remaining section to start the next row if it meets the manufacturer’s minimum length requirements.
Step 6: Connect the Planks and Stagger the Joints
Continue laying the flooring row by row. Angle the plank into the adjoining board or use the specified locking method for your flooring system. Press the joint into place and use a tapping block only when instructed.
Stagger the end joints between neighbouring rows to create a balanced pattern. Follow the required minimum joint offset and avoid placing short end pieces in a repeated sequence.
Inspect each row for gaps before continuing. If a joint refuses to close, separate the boards and check for debris, misalignment, or a damaged locking edge. Never force a connection with heavy blows.
Step 7: Cut the Final Row and Finish the Edges
Measure the remaining space carefully, accounting for the expansion gap. Cut the final row to width and use a pull bar where necessary to connect the joints.
For door frames, undercut the casing where appropriate so the plank fits neatly underneath. Measure around pipes and other fixed obstacles while preserving the required clearance.
Remove the spacers after installation. Fit skirting boards or finishing trim to cover the perimeter gap without pinning the floating floor to the subfloor. Install transition profiles where the flooring system requires them.
If the project involves several rooms, uneven subfloors, or complicated doorways, a Laminate flooring installation expert is a useful option for planning and fitting the floor correctly.
Common Mistakes to Avoid
Avoid these errors during laminate flooring installation:
- Skipping subfloor moisture and level checks.
- Ignoring the manufacturer’s acclimation requirements.
- Leaving insufficient expansion space around fixed objects.
- Using incompatible underlayment.
- Repeating end joints in the same position across rows.
- Forcing damaged or misaligned click-lock connections.
- Fixing skirting or heavy built-in units in a way that restricts the floating floor.
Frequently Asked Questions
How long does laminate flooring installation take?
A straightforward room might take a weekend for an experienced DIY installer. The total time depends on room size, subfloor preparation, cutting requirements, and the manufacturer’s preparation instructions.
Does laminate flooring need underlayment?
Some products require separate underlayment, while others include an attached backing. Follow the specific product instructions before installation.
Which direction should laminate flooring run?
Running planks along the longest wall or towards natural light often creates a balanced appearance. Room shape, doorways, and adjoining floors also affect the layout.
Can laminate flooring be installed over existing tiles?
Some laminate systems permit installation over existing tiles when the surface is sound, clean, dry, and sufficiently level. Follow the manufacturer’s requirements and remove any loose or unsuitable flooring first.
Get a Neat, Lasting Laminate Floor Finish
Successful laminate flooring installation starts with accurate measurements and a properly prepared subfloor. Follow the product’s instructions for moisture protection, expansion gaps, plank connections, and finishing details. For rooms with complicated layouts or substantial preparation work, professional installation helps address these challenges before they affect the finished floor.


